Before beginning, consider that the routing presented in this guide is not mandatory to copy but is merely a suggestion for maximum control. Feel free to change or modify the grouping according to your needs and workflow.
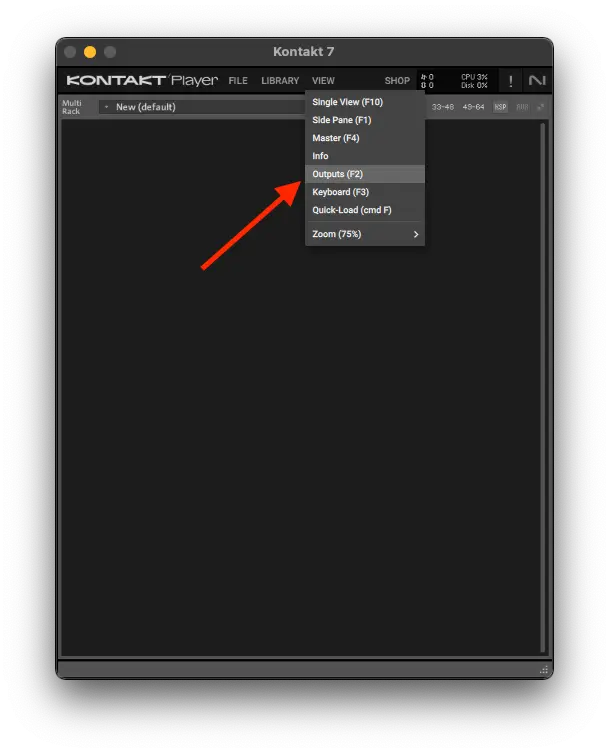
Step 1: Open Kontakt (STANDALONE) and go to the output section by going into the VIEW menu and pressing “Outputs” or pressing the F2 key.
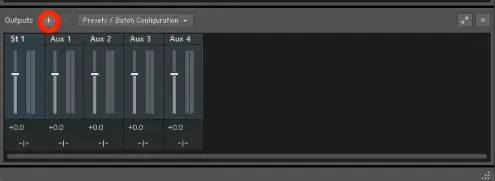
Step 2: In the output section click on the + sign.
Step 3: Create the channels you need (for our case, we’ll first create 14 mono channels and 8 stereo ones afterward, ignoring the st. out and aux 1 to 4.)
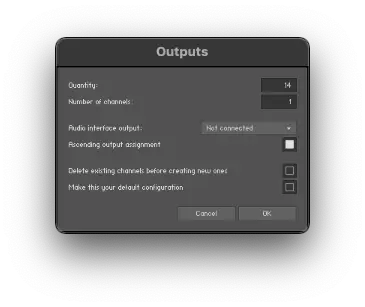
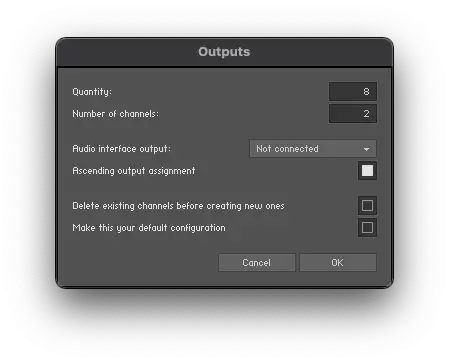
(Keep in mind that the number of channels refers to the width of the track: Mono, stereo, LCR, etc while the quantity refers to how many channels of said width will be created).
Step 4: Load Extinction Level Event and rename the created tracks by pressing on the track name on top of the fader.
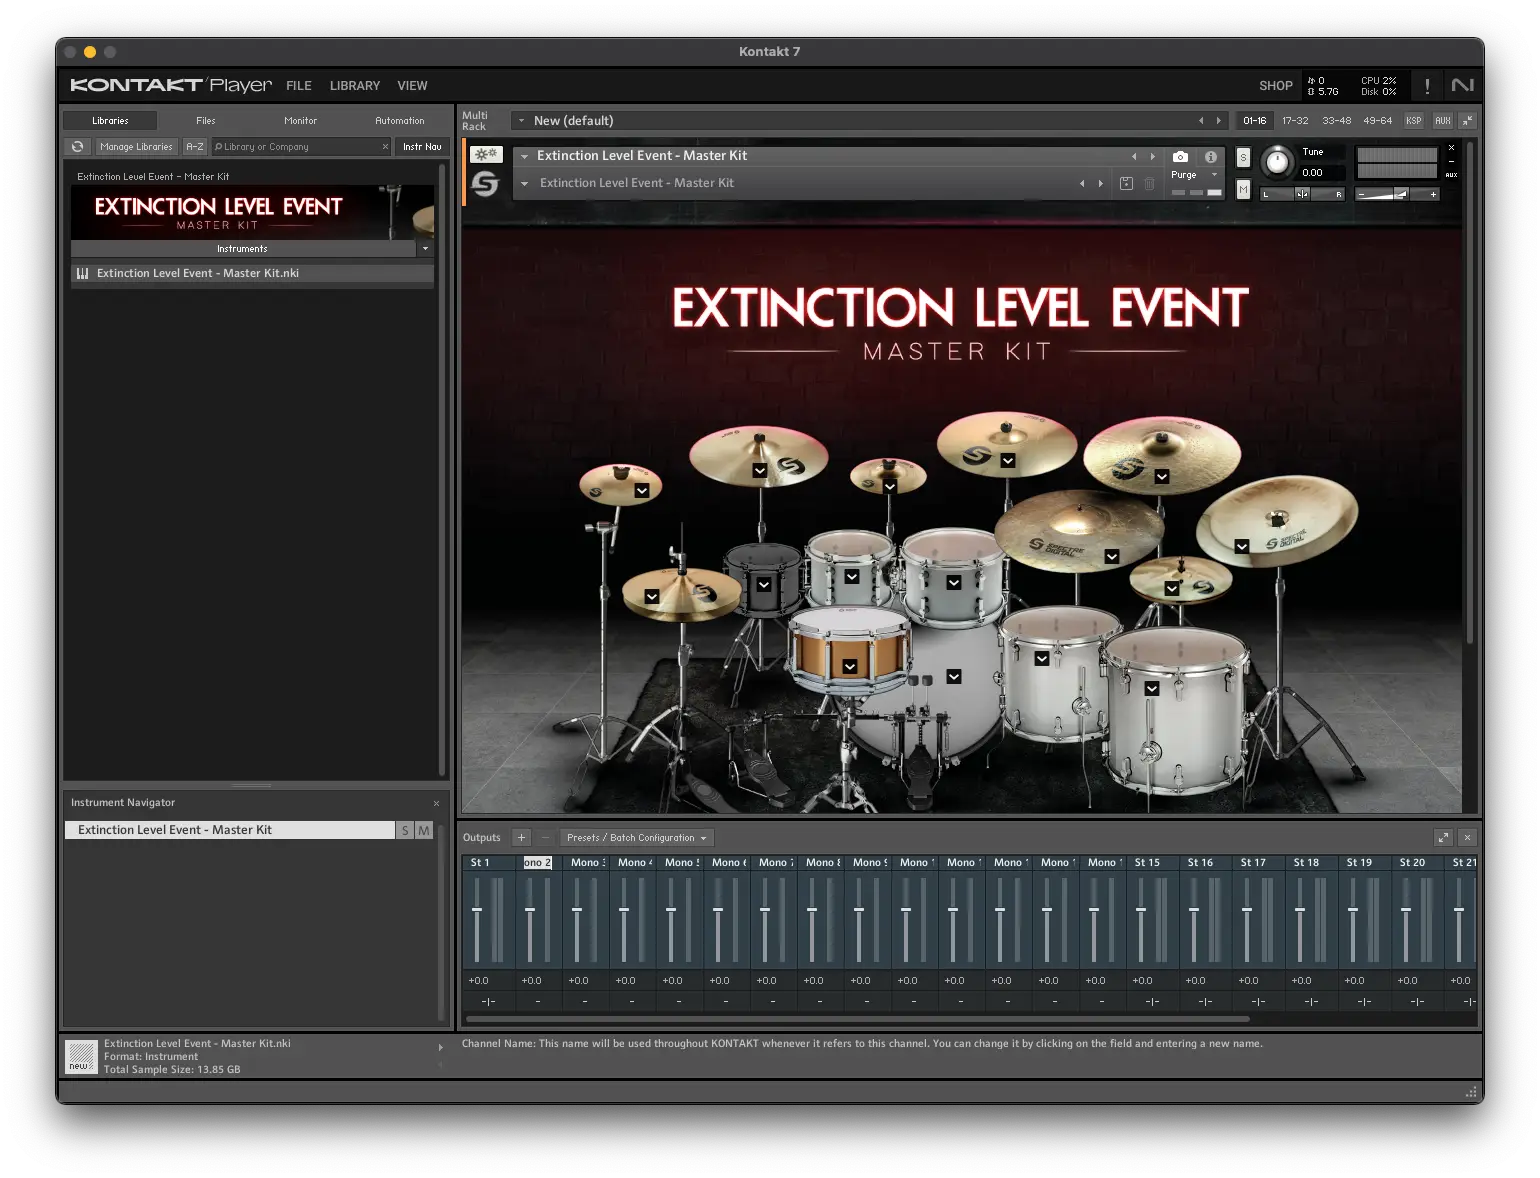
(For this routing we will name the channels in the following order: BD IN 91A, BD IN 2, BD OUT, BD SUB, SD TOP, SD BOT, RT1, RT2, RT3, FT1, FT2, HATS, RIDE, FX CYM, OH SDC, OH LDC, RM1, RM2, RM3, HALL, FoK).
Step 5: With your routing done, save the output section as default for VST plugins (or save it as a preset if you plan on using other Kontakt instances with different libraries loaded).

Step 6: Close the Kontakt standalone app, open Studio One, and create an instrument track.
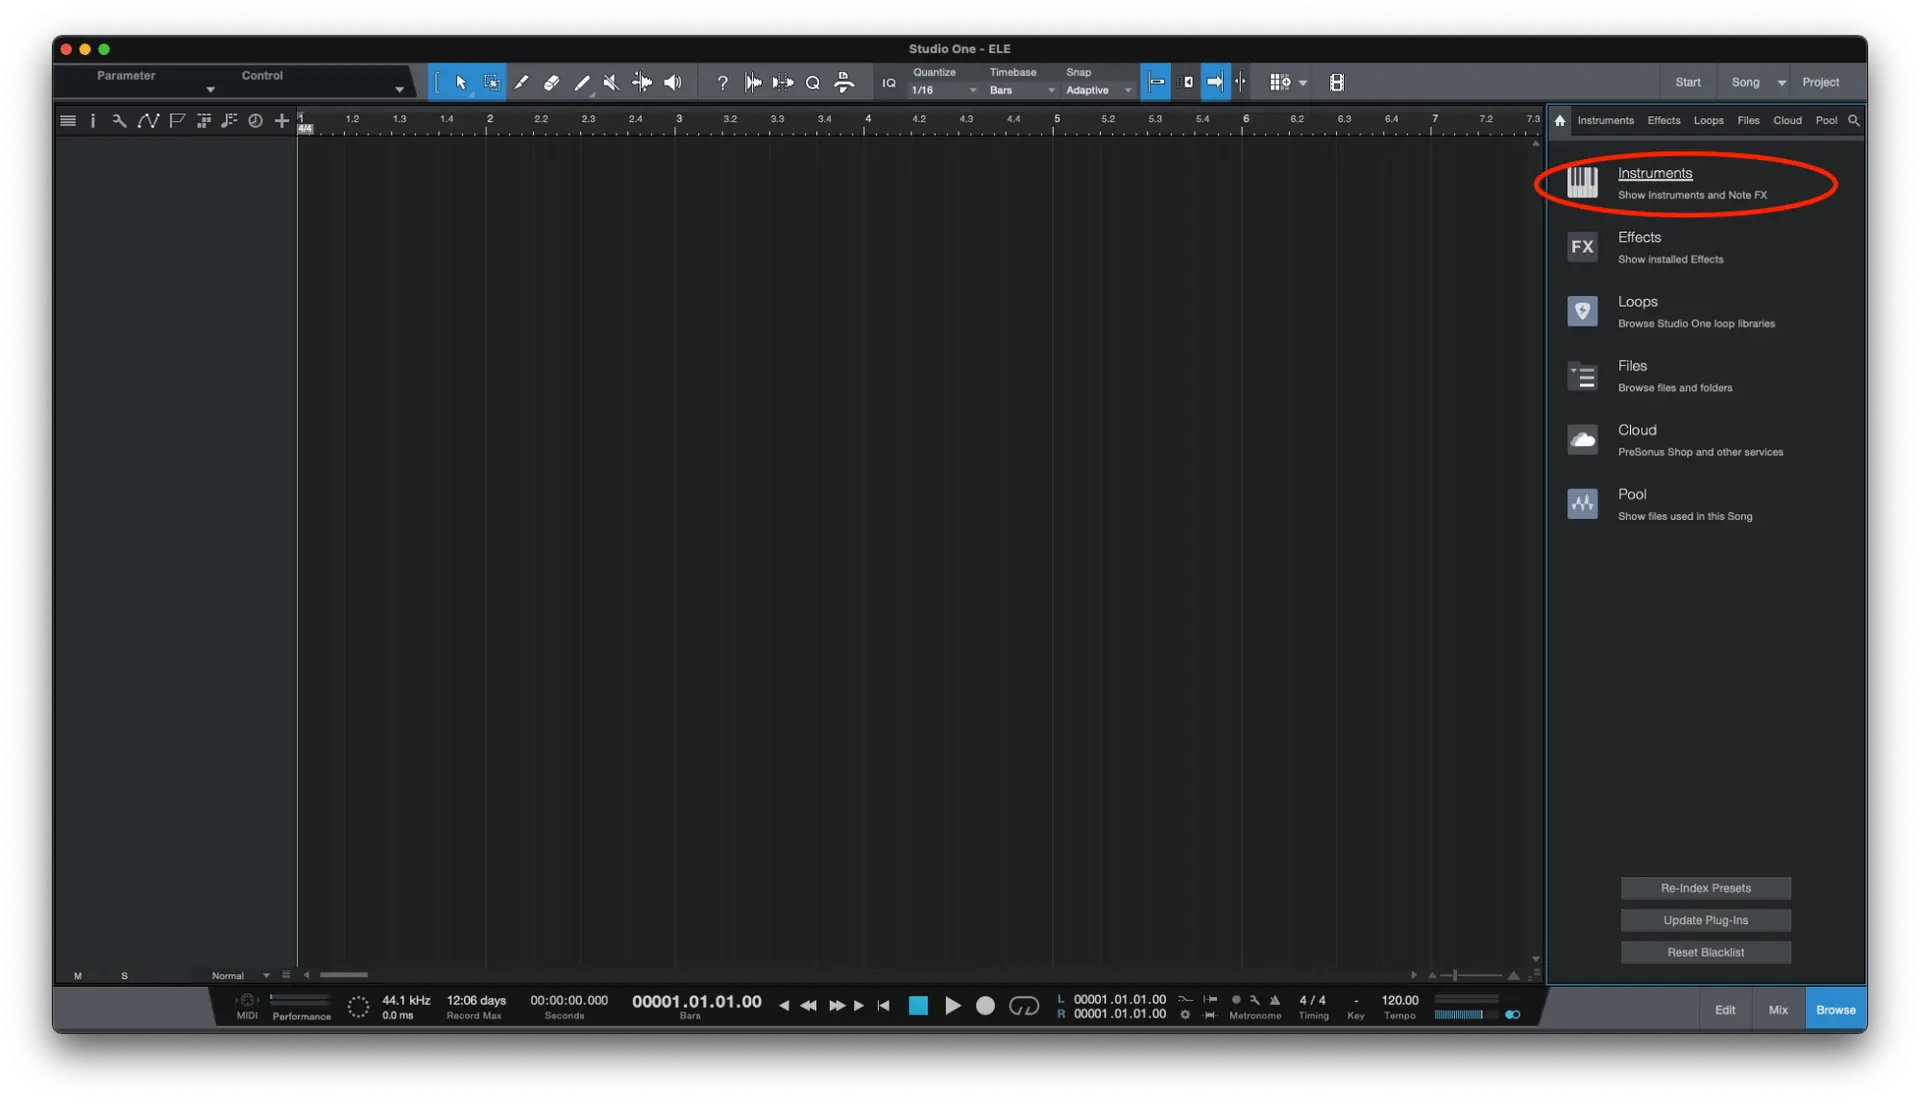
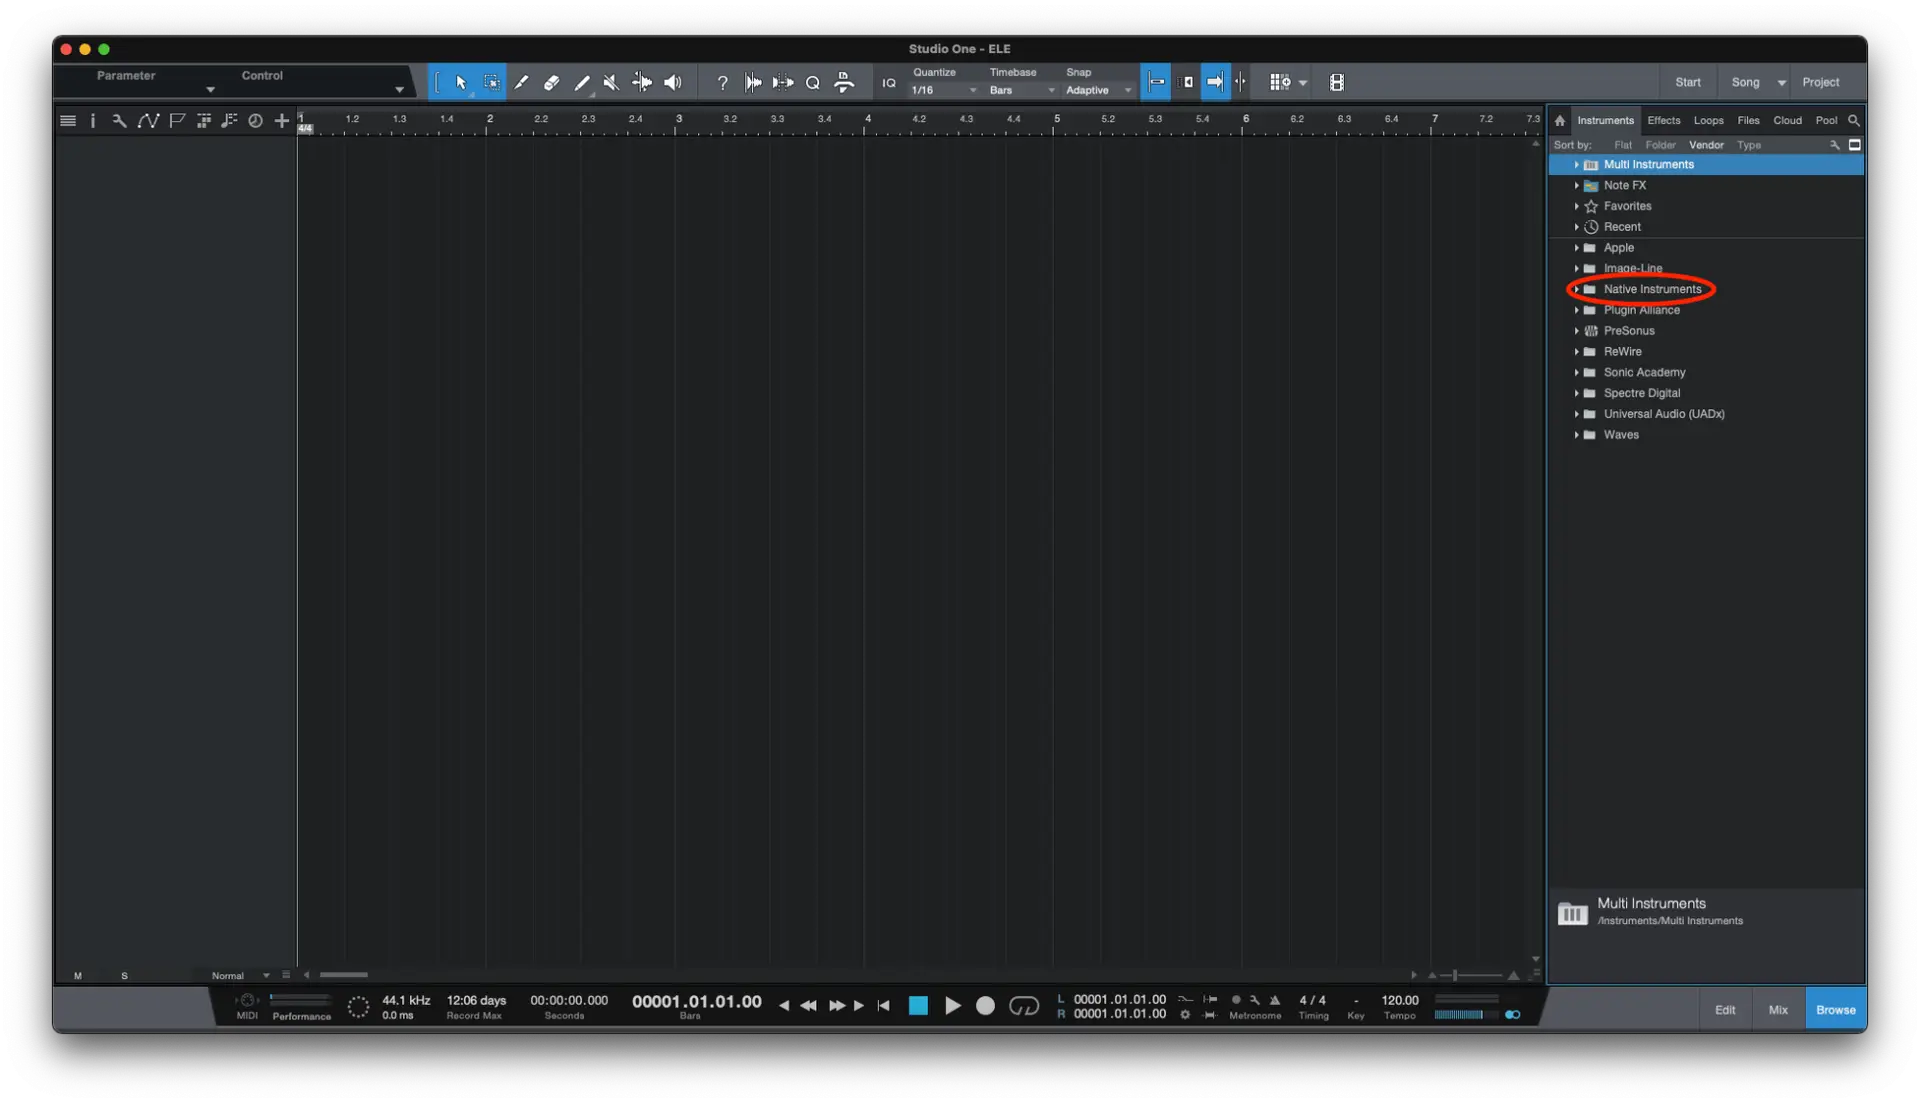
Step 7: Go to the Native Instruments section and load the VST version of Kontakt 7
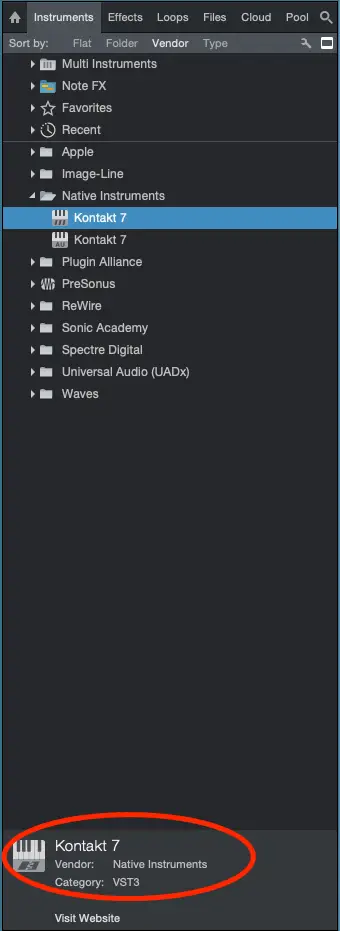
Step 8: Route the Individual outs to their respective channels in Kontakt running inside Studio One by pressing the – sign under the channel fader.
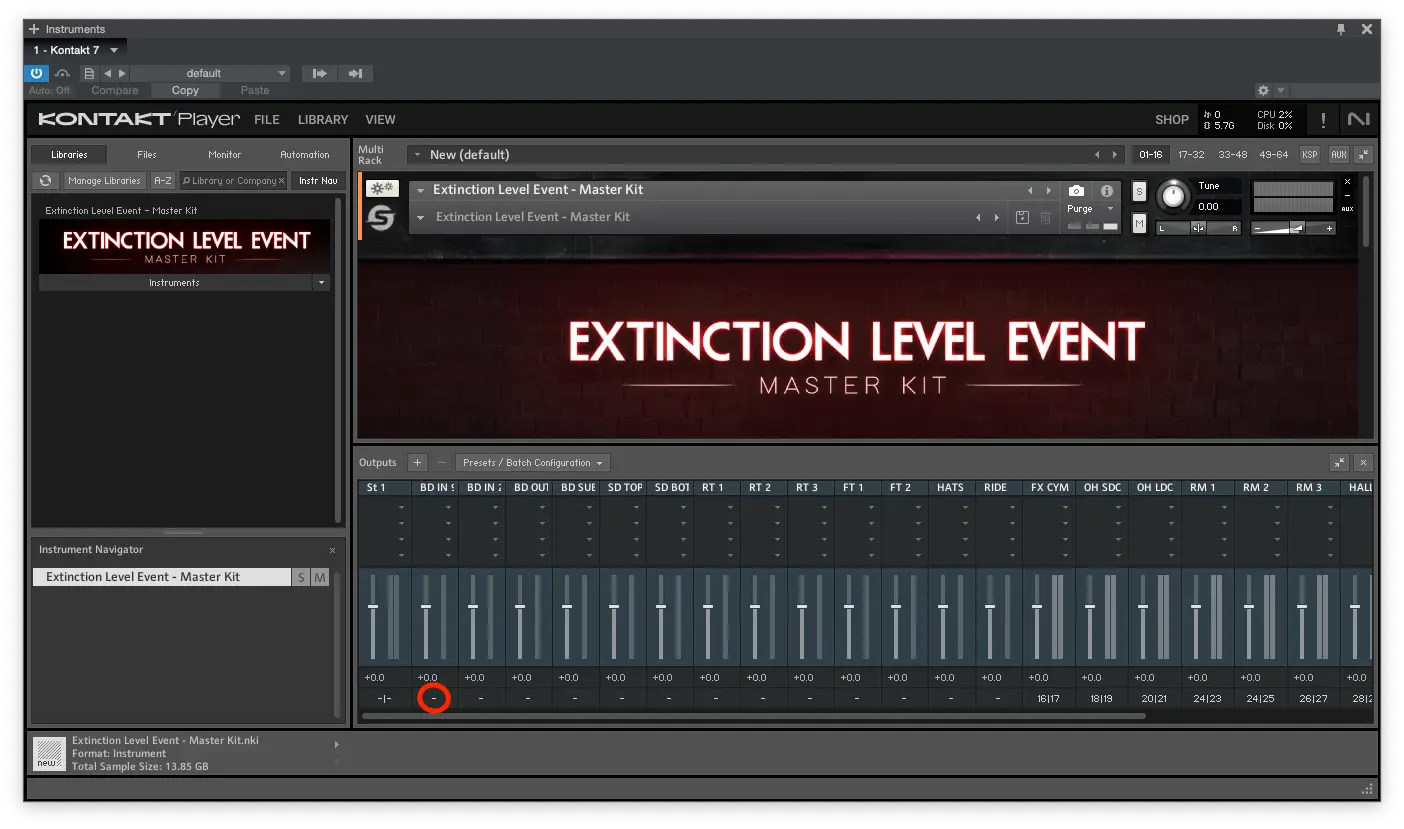
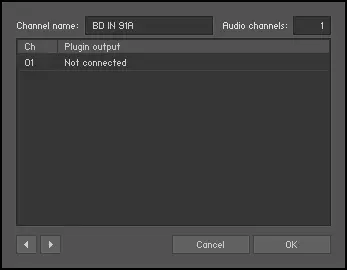
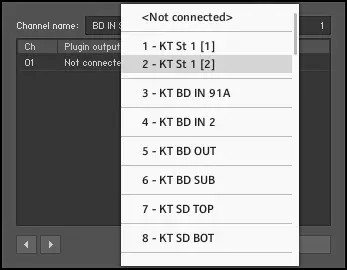
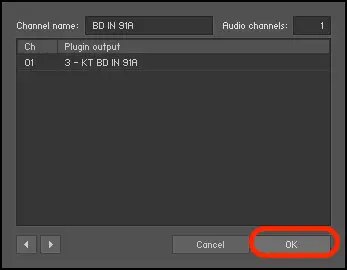
Step 9: After the following message appears, save your project, close it, and re-open it.
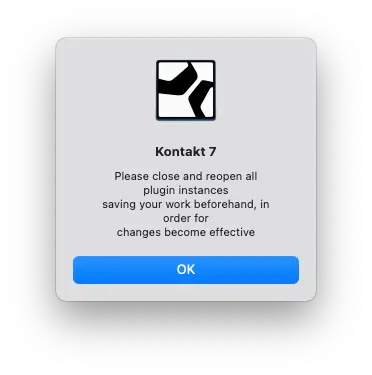
Step 10: Route every component in the library to their respective outputs by clicking the “Master” channel under the channel fader in the mixing window and assigning it to their specific output.
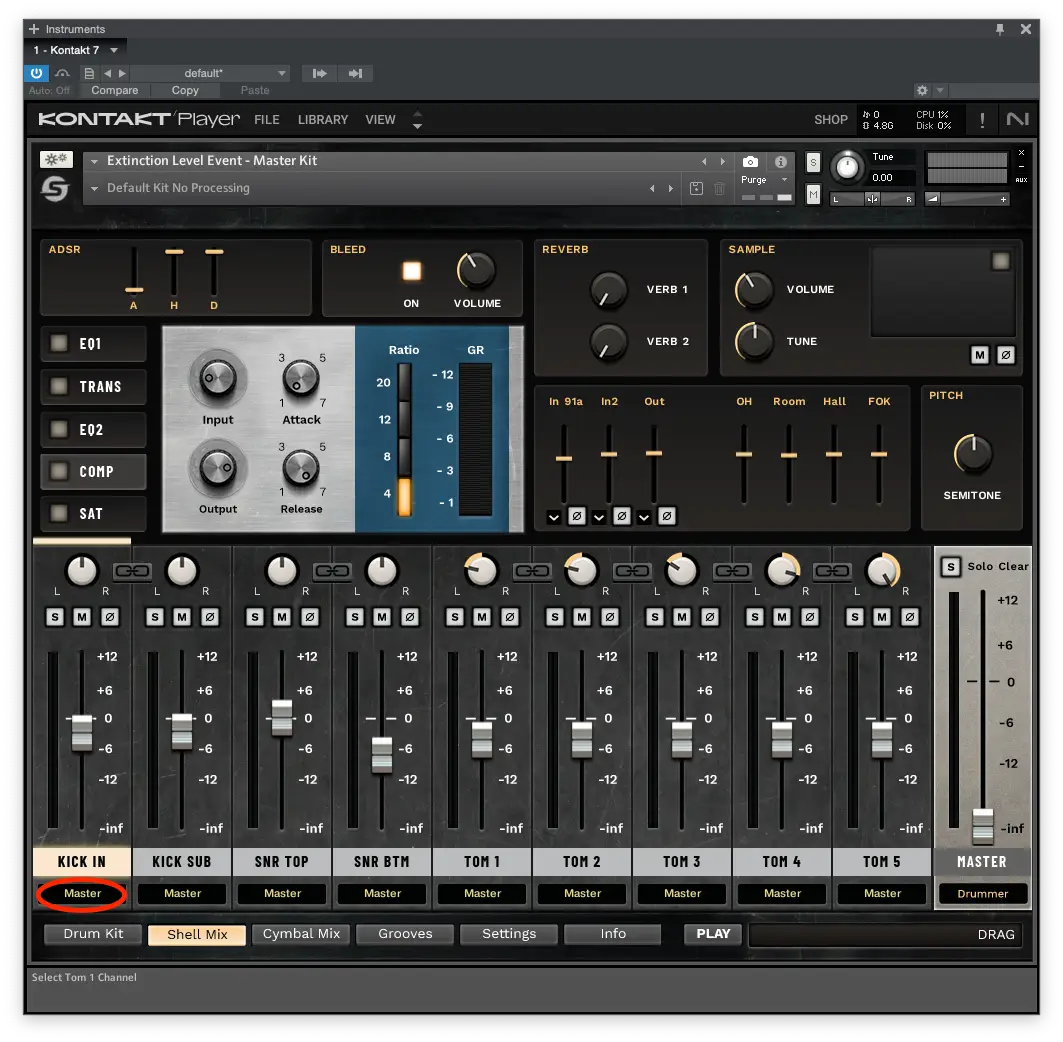
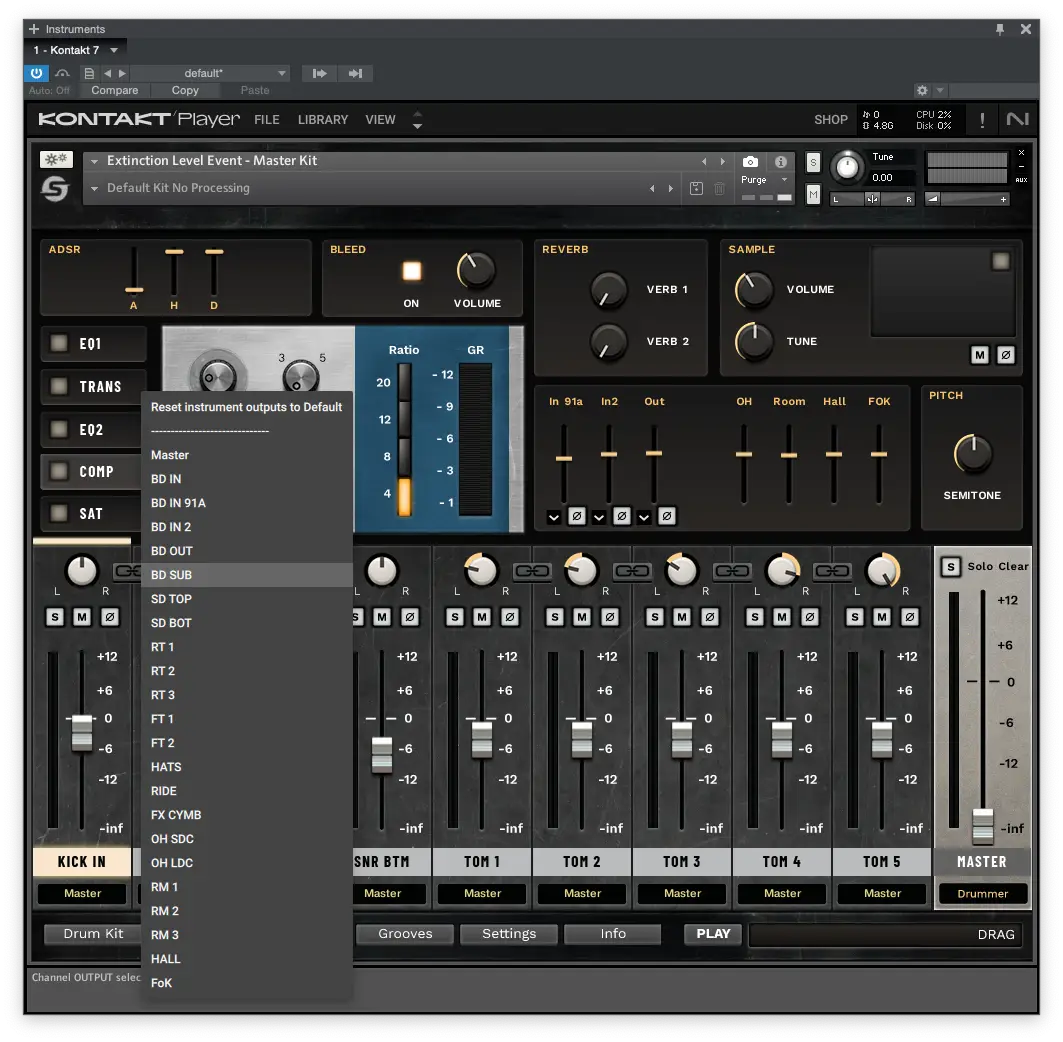
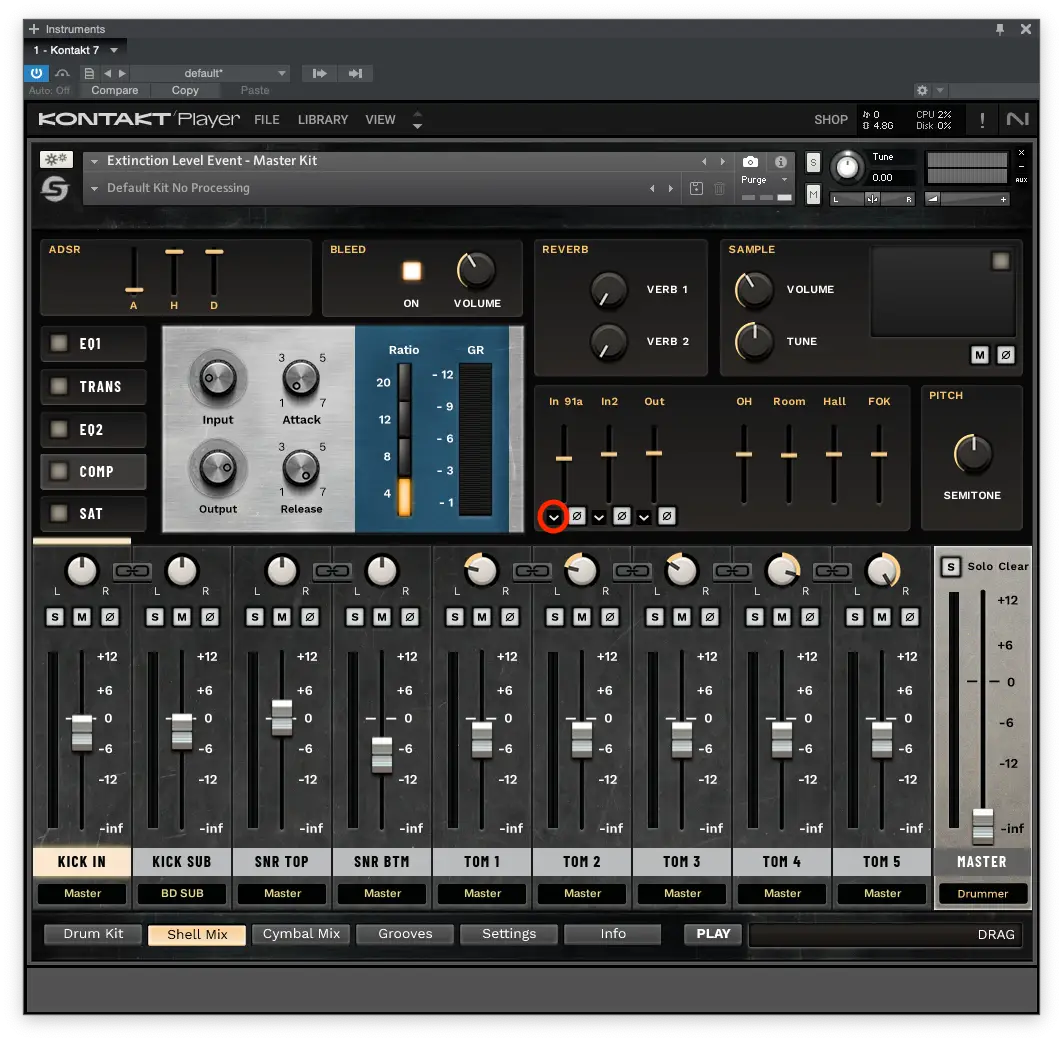
Step 10.1: Since we’re not using all the buses (such as KICK IN, ROOMS, and OVERHEAD) and routing their pieces to an exclusive output there will be an extra step. Open the bus (In this example KICK IN) and click the arrow under the element you wish to route, then select its output. After you’ve done that, select the blank option for the bus you’ve routed.
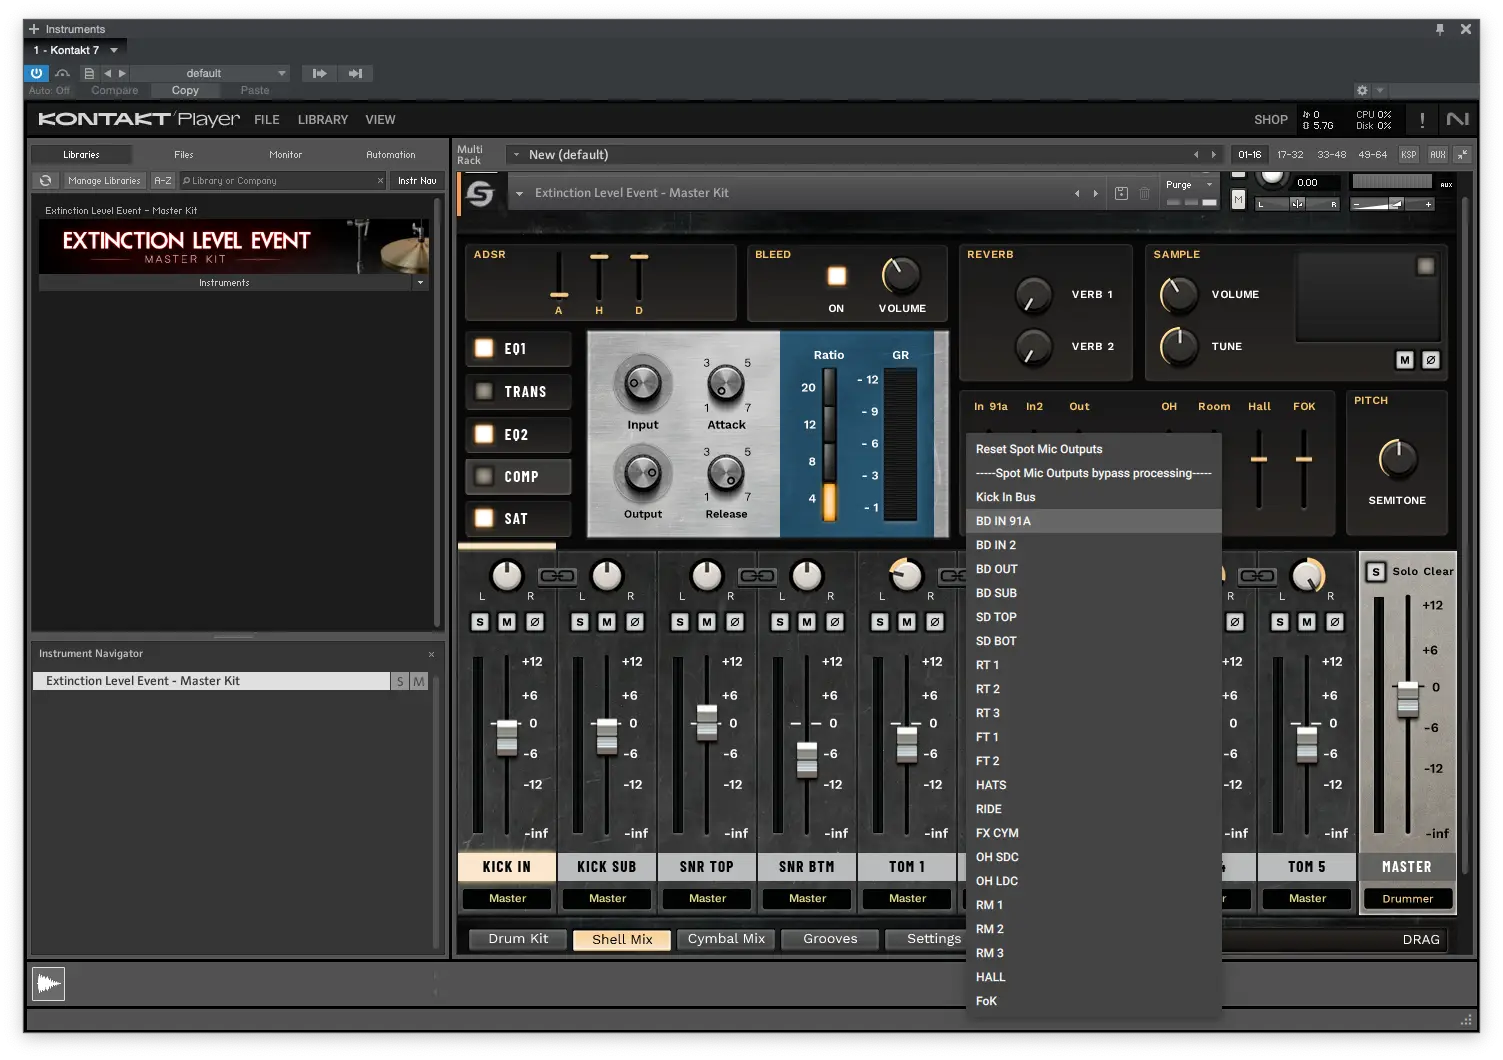
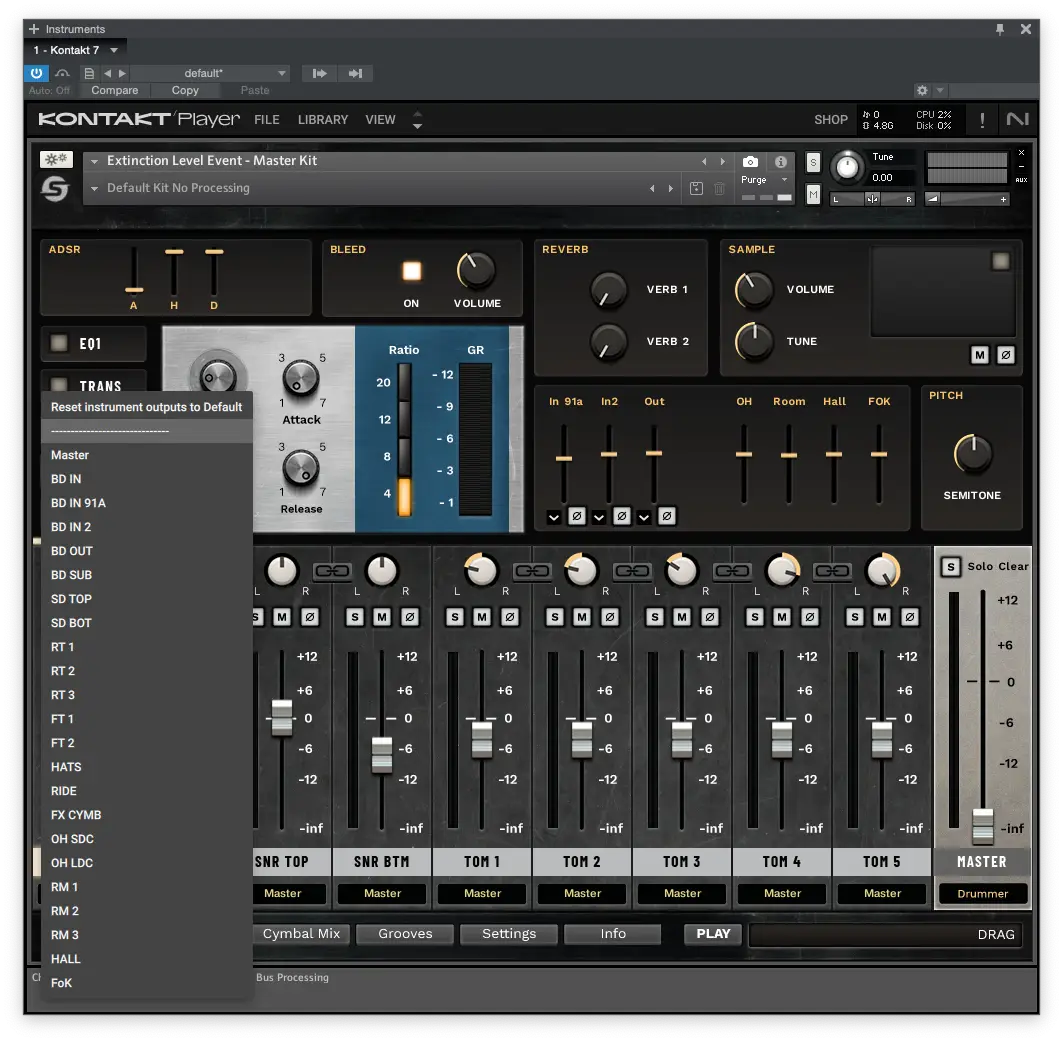
Step 11: Open the Studio One Console and expand it, then press “expand” on the Kontakt 7 tab

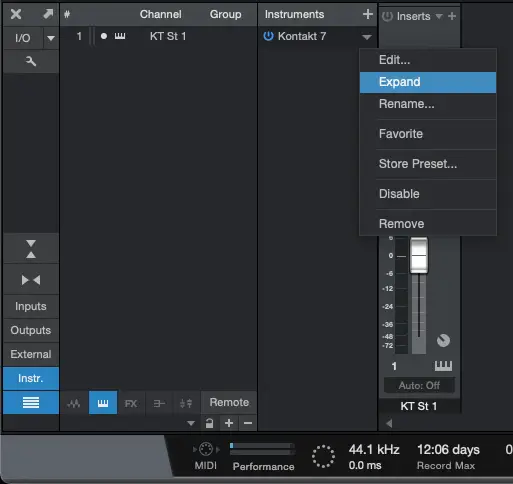
Step 12: Enable the checkboxes to activate all outputs.
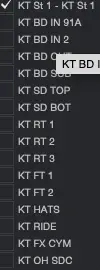
After you’re done, your Studio One window should look like the image below.
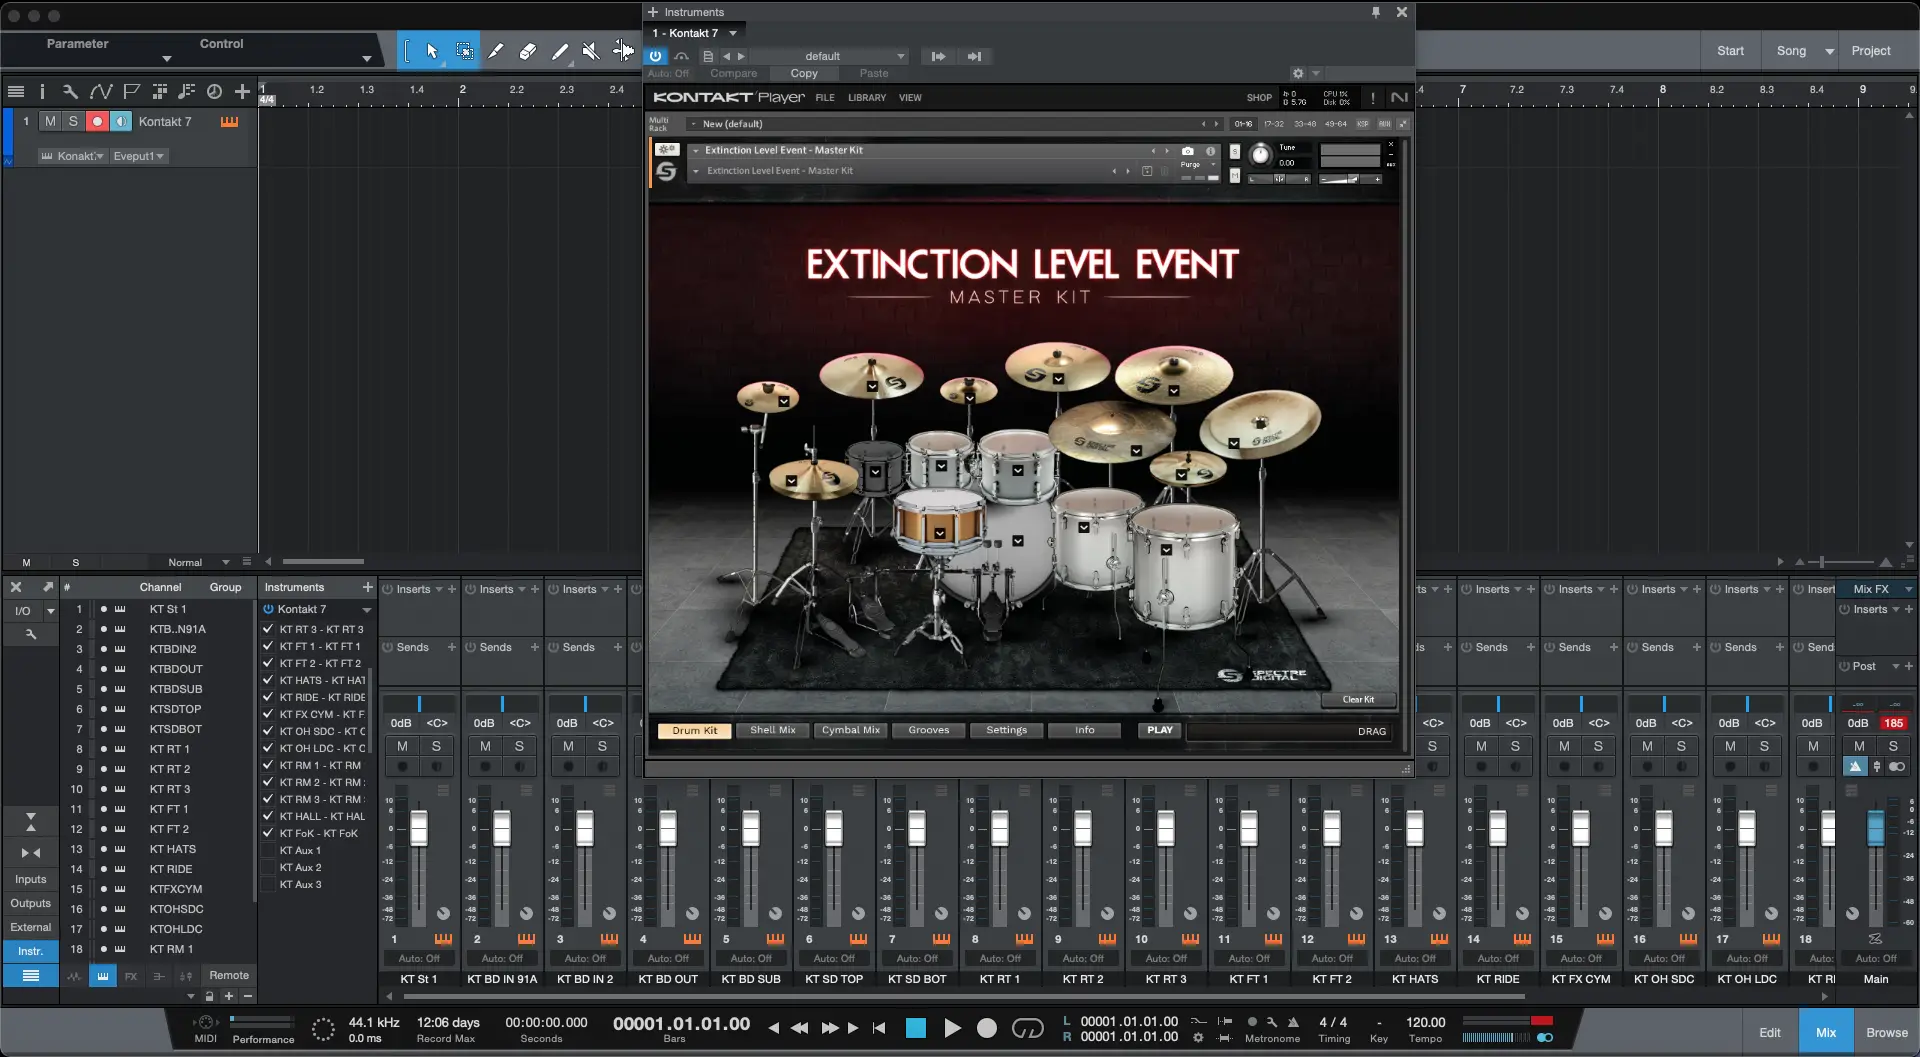
Congratulations! You’ve successfully routed all outputs to their respective auxiliary channel, enjoy!

